Build a solar iPod charger
Build at your own risk, this is just my experience. I originally built these chargers and wrote this article in 2006, but many things have changed in the last six years.
|
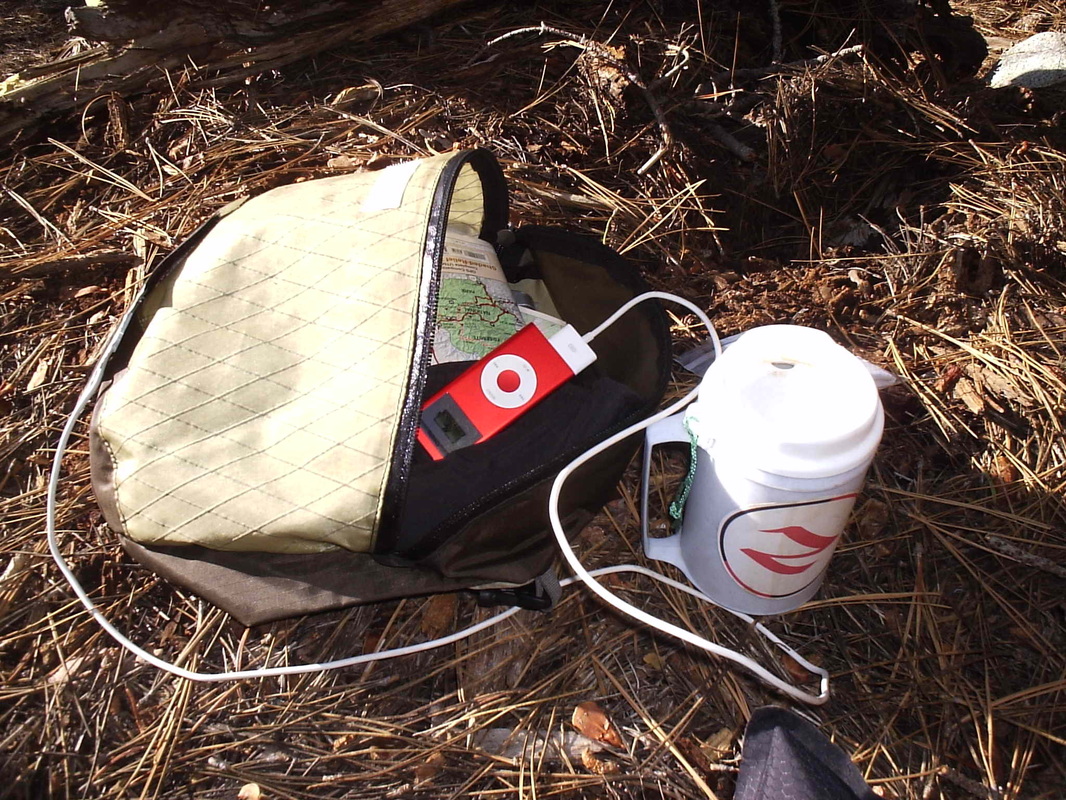
I looked everywhere for a lightweight solar iPod charger. Nothing fancy, just something I could attach to the top of my backpack. I couldn’t find one anywhere, I couldn’t even find instructions on how to build one. So, I set about building one for myself. As this was all about getting very light materials, this set-up is very simple but the charger has no protection from branches, rain, or marmots. Also, understand that I am not an engineer. I have attempted to safely mimic the power from a USB connections. Namely, 5VDC and less than 500mA. But, this could destroy your iPod, create a rift in space-time or bring about the end of the world. It’s your call, baby. I’m just saying this is how I did it.
Device details:
Solar iPod charger approx. 2.5 oz. 150mA@5VDC Materials:
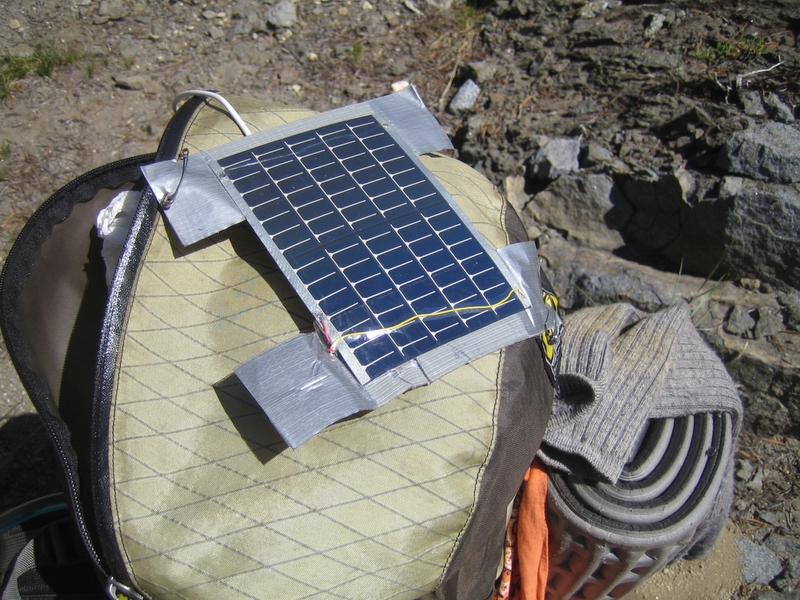
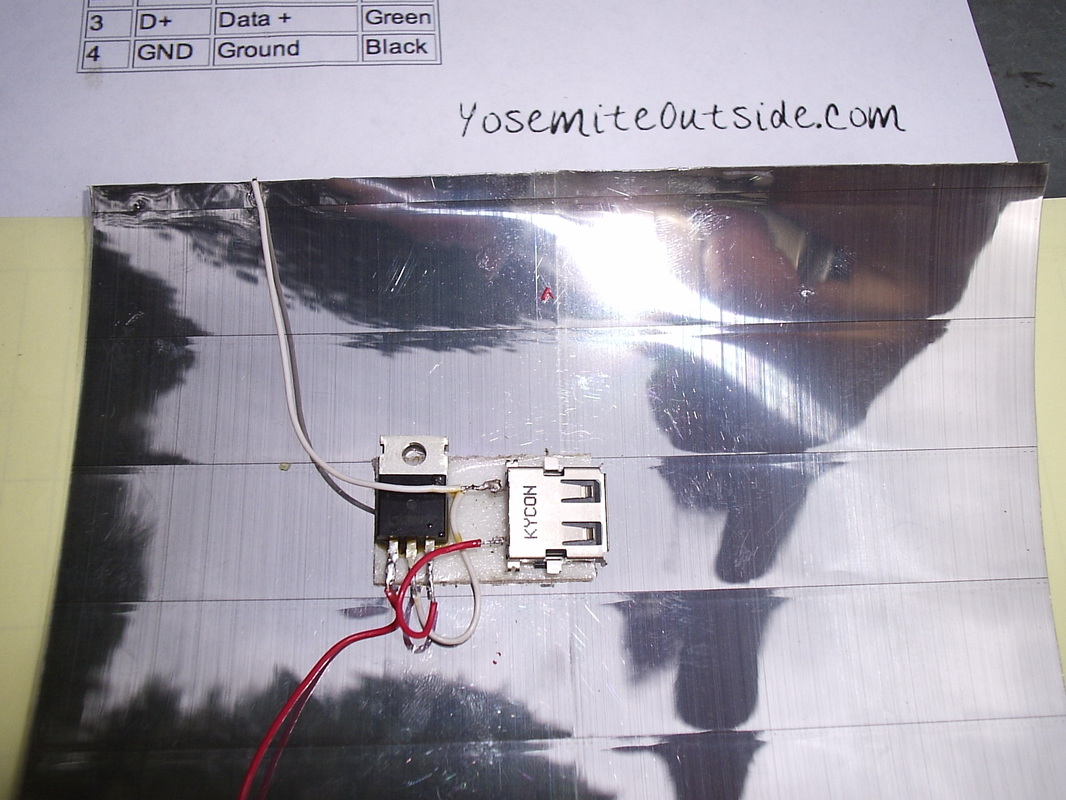
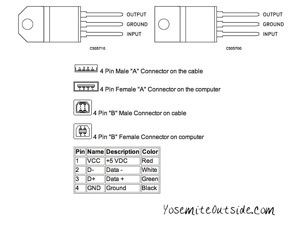
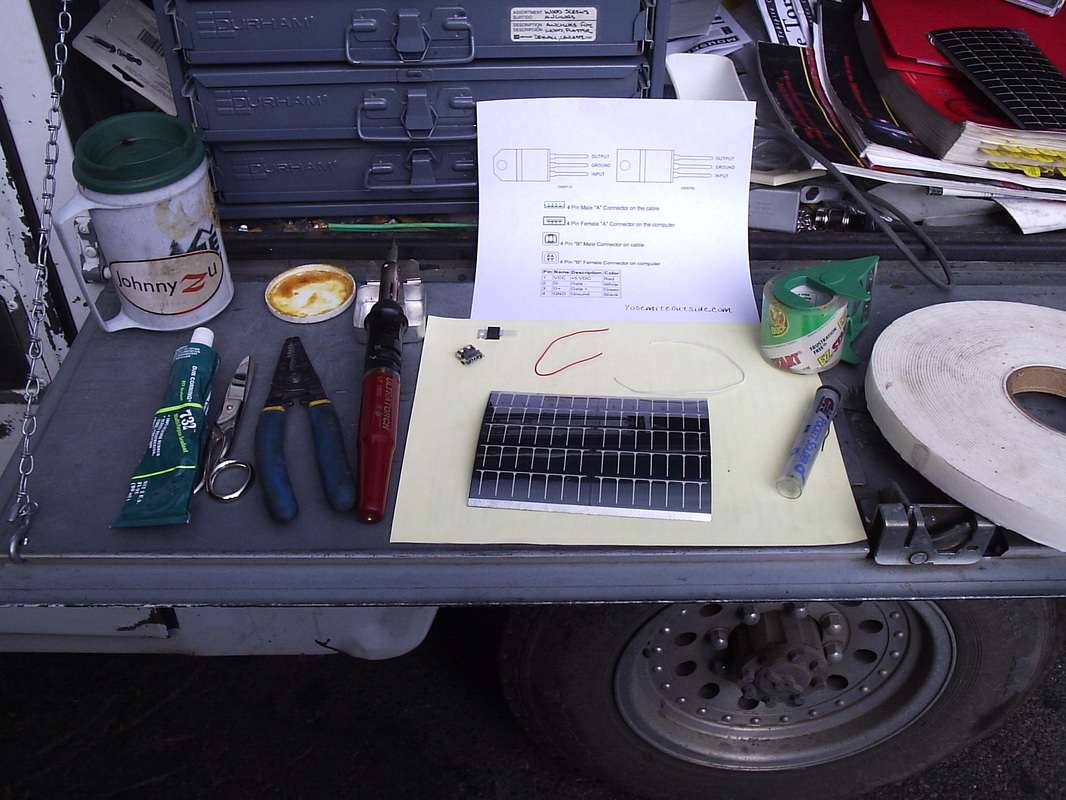
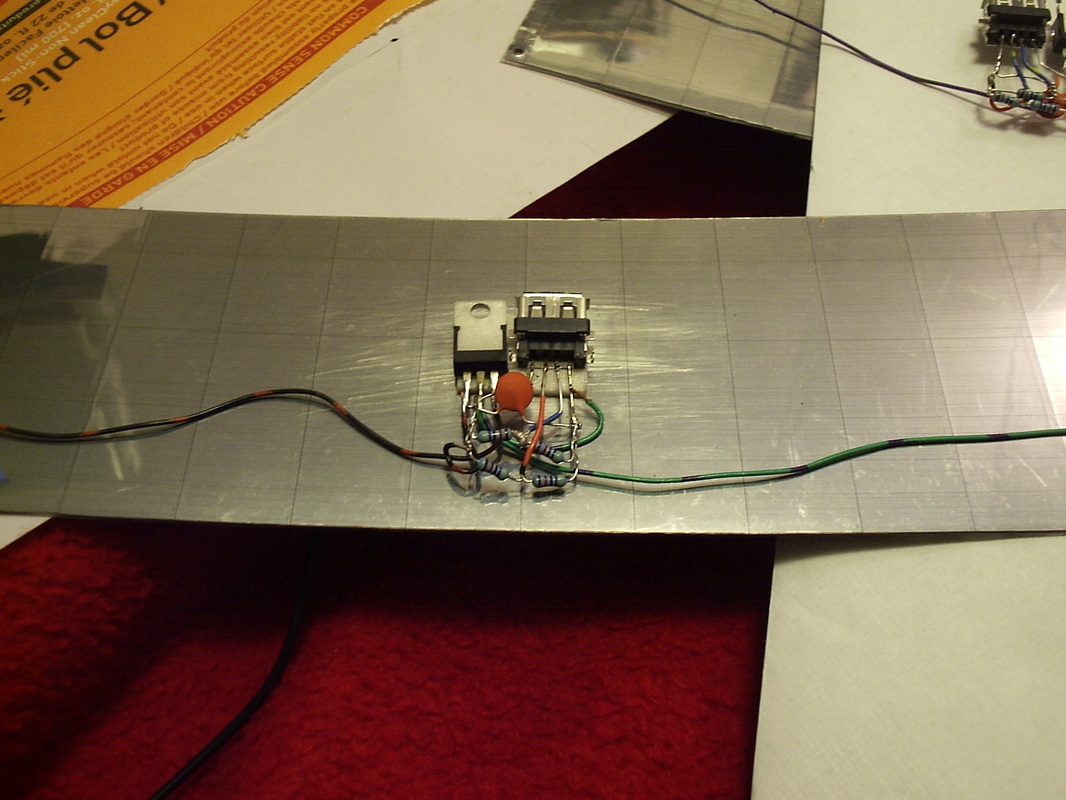
From Mouser Electronics: 1) Part# 806-KUSBLX-SMTAS1NB, Kycon USB-A female connector. 2) Part# 511-L78M05CV, ST Voltage Regulator, 5.0V 0.5A. From Sundance Solar: 3) Part# 700-50061-00, “PowerFilm” flexible Solar Panel, Model# MPT6-150, 6V,100mA. From various sources: 4) 20 gauge wires, approx 12” long. 5) velcro strip, 1” X 4”. 6) silicone sealant, five minute epoxy or super glue. 7) packing tape. 8) A wee-bit of double-sided tape. 9) solder and flux. 10) exceptionally good coffee. 11) schematics. Tools: 1) soldering iron.2) wire strippers. 3) multi-meter. 4) scissors. The process:
1) I assemble all my stuff: 2) I sip on some exceptionally good coffee. 3) I solder the leads onto the front of the solar panel and wrap them around to the back of the panel. Then I trimmed and tinned all my leads. 4) I attached the two sided tape to the back of the solar panel, stuck on the USB-A connector and voltage regulator and soldered the wiring, using the handy little guide. 5) Then, I attached the multimeter leads to the back of the USB-A connector to ensure my polarity is correct. Simple, huh? 6) I double checked everything to make sure it is correct. 7) I use the packing tape to secure the wiring that runs from the front side of the panel and wrap the tape around to the front side to insulate the solder spots. Super glue, caulk (careful, it’s heavy), packing tape or five minute epoxy can be used to secure the assembly to the back of the solar panel and to insulate the electrical leads. After building a few of these, I think I prefer to use epoxy to insulate the electrical components and packing tape to cover the whole assembly semi- smoothly. But, I am still refining this part. 8) After the construction is complete, I lightly sand the back of the panel and attach Velcro in order to secure it to my backpack. Thats it. Then I went backpacking. Later, Apple changed it's requirements for charger to function with it's equipment, so we had to add some resistors and capacitors and whatnot. But, as of 2013, I'm thinking that the best way to make one of these is to just buy a car charger, rip out the electronics, and solder them onto a lightweight solar panel. |
|
